 Roof/Chimney
A Dry Idea: You can visually inspect many problems from the ground with a pair of binoculars. Other maintenance items will need close inspection from a ladder or by walking on the roof itself. Climbing ladders and walking on the roof can be dangerous. Rain, snow, or frost may cause slippery conditions, so it's advisable to wait until the roof surface is dry. It's also important to wear sturdy, skid-resistant shoes, and to watch for tripping hazards like tools and electric cords. If you are not comfortable climbing ladders or walking on the roof, call an expert to perform the inspection. One effective method of pinpointing trouble spots is to walk around the house during a heavy rain. Rain will reveal how water flows from the roof into gutters and away from your house.
-
Replace missing, upturned, or irregular shingles.
-
Look for exposed or protruding nails. Pull the nail and replace with a larger, hot-dip galvanized nail if the flashing is galvanized sheet metal, or stainless steel nail if the flashing is stainless steel.
-
Carefully remove debris build-up in valleys and at wall-to-roof intersections so that shingles and flashings are not damaged.
-
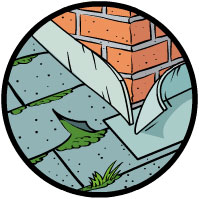
Inspect flashing around chimney and other roof penetrations. If chimney flashing has cracked or pulled away, call in an expert to repair.
-
For Northern climates:
-
Remove moss and lichen growth with a blower, garden hose stream, or small broom. Pressure washing can shorten shingle life. Direct water streams down the roof, never up under the shingles.
-
During snowy, freezing weather, check for ice dams. Ice dams can form at the eaves of poorly insulated attics when warmth from the home melts snow over the heated area of the home. The water then refreezes over the unheated eaves, creating the ice dam. If the ice builds up sufficiently, the snowmelt water can back up the roof, intrude under the shingles and leak into the exterior walls and onto the ceiling. The most efficient correction for this condition is additional insulation and additional attic ventilation.
 Gutters/Downspouts
A Dry Idea: You'll need to get on the ladder to inspect and clean all the gutters. Climbing ladders and can be dangerous. If you are not comfortable climbing ladders, call an expert to perform the inspection. Pesky debris (leaves, needles, and seedlings) can be minimized with gutter and downspout screens, available from most hardware stores. One effective method for pinpointing trouble spots is to walk around the house during a heavy rain. Rain will reveal how water flows from the roof into gutters and away from your house.
-
Look for loose joints. Clean and recaulk as necessary and replace rusted screws.
-
Clean gutters with a blower, hose or small broom. Using a hose stream will help pinpoint leaks and other trouble spots. Use gutter caulk on leaking joints or replace sections according to manufacturer’s instructions.
-
Downspouts should drain away from the house. If the downspouts dead-end near the foundation, install splash blocks to direct water away from the foundation.
-
If draining to a dry well, clear out roots and debris.
 Windows/Doors/Siding
Drip Alert: Industry research has determined that bulk water intrusion from the exterior is responsible for a majority of the moisture related problems. Poorly sealed windows, doors, and siding are some of the major culprits. Just one crack in the caulk necessitates replacing all the caulk.
-
Remove all old caulk using chemical caulk remover, putty knife, or other blunt-end, thin tool. Never apply fresh caulk over older caulk.
-
Clean the surface of the frames or door frame to be caulked with rubbing alcohol.
-
Place a foam backer rod in seams more than 1/2 in. wide or 1/4 in. deep.
-
Using a caulk gun held at 45 degrees, push the bead ahead of the nozzle. Don’t fill weep holes at the base of the window frame.
-
Use a spoon dipped in soapy water to apply a smooth finish before the caulk cures.
-
Check the weather-stripping along doors. Detrimental weather conditions can cause weather-stripping to disintegrate, leaving gaps for air and moisture to enter.
-
Inspect and recaulk seams in siding. If you are between paint jobs, clear caulks are available that will blend with the house color.
-
Inspect stucco and brick surfaces for cracked mortar. You can either call in a professional or obtain patch kits from your hardware store.
-
Keep a minimum 6 in. clearance between the siding and the ground.
-
Using a small mirror, inspect bottom edges of siding close to the ground. Prime and paint any unfinished siding drip edges.