Spring 2019

Highlights from this Month's e-Newsletter
Feature
Students Compete to Design, Build Timber Structures 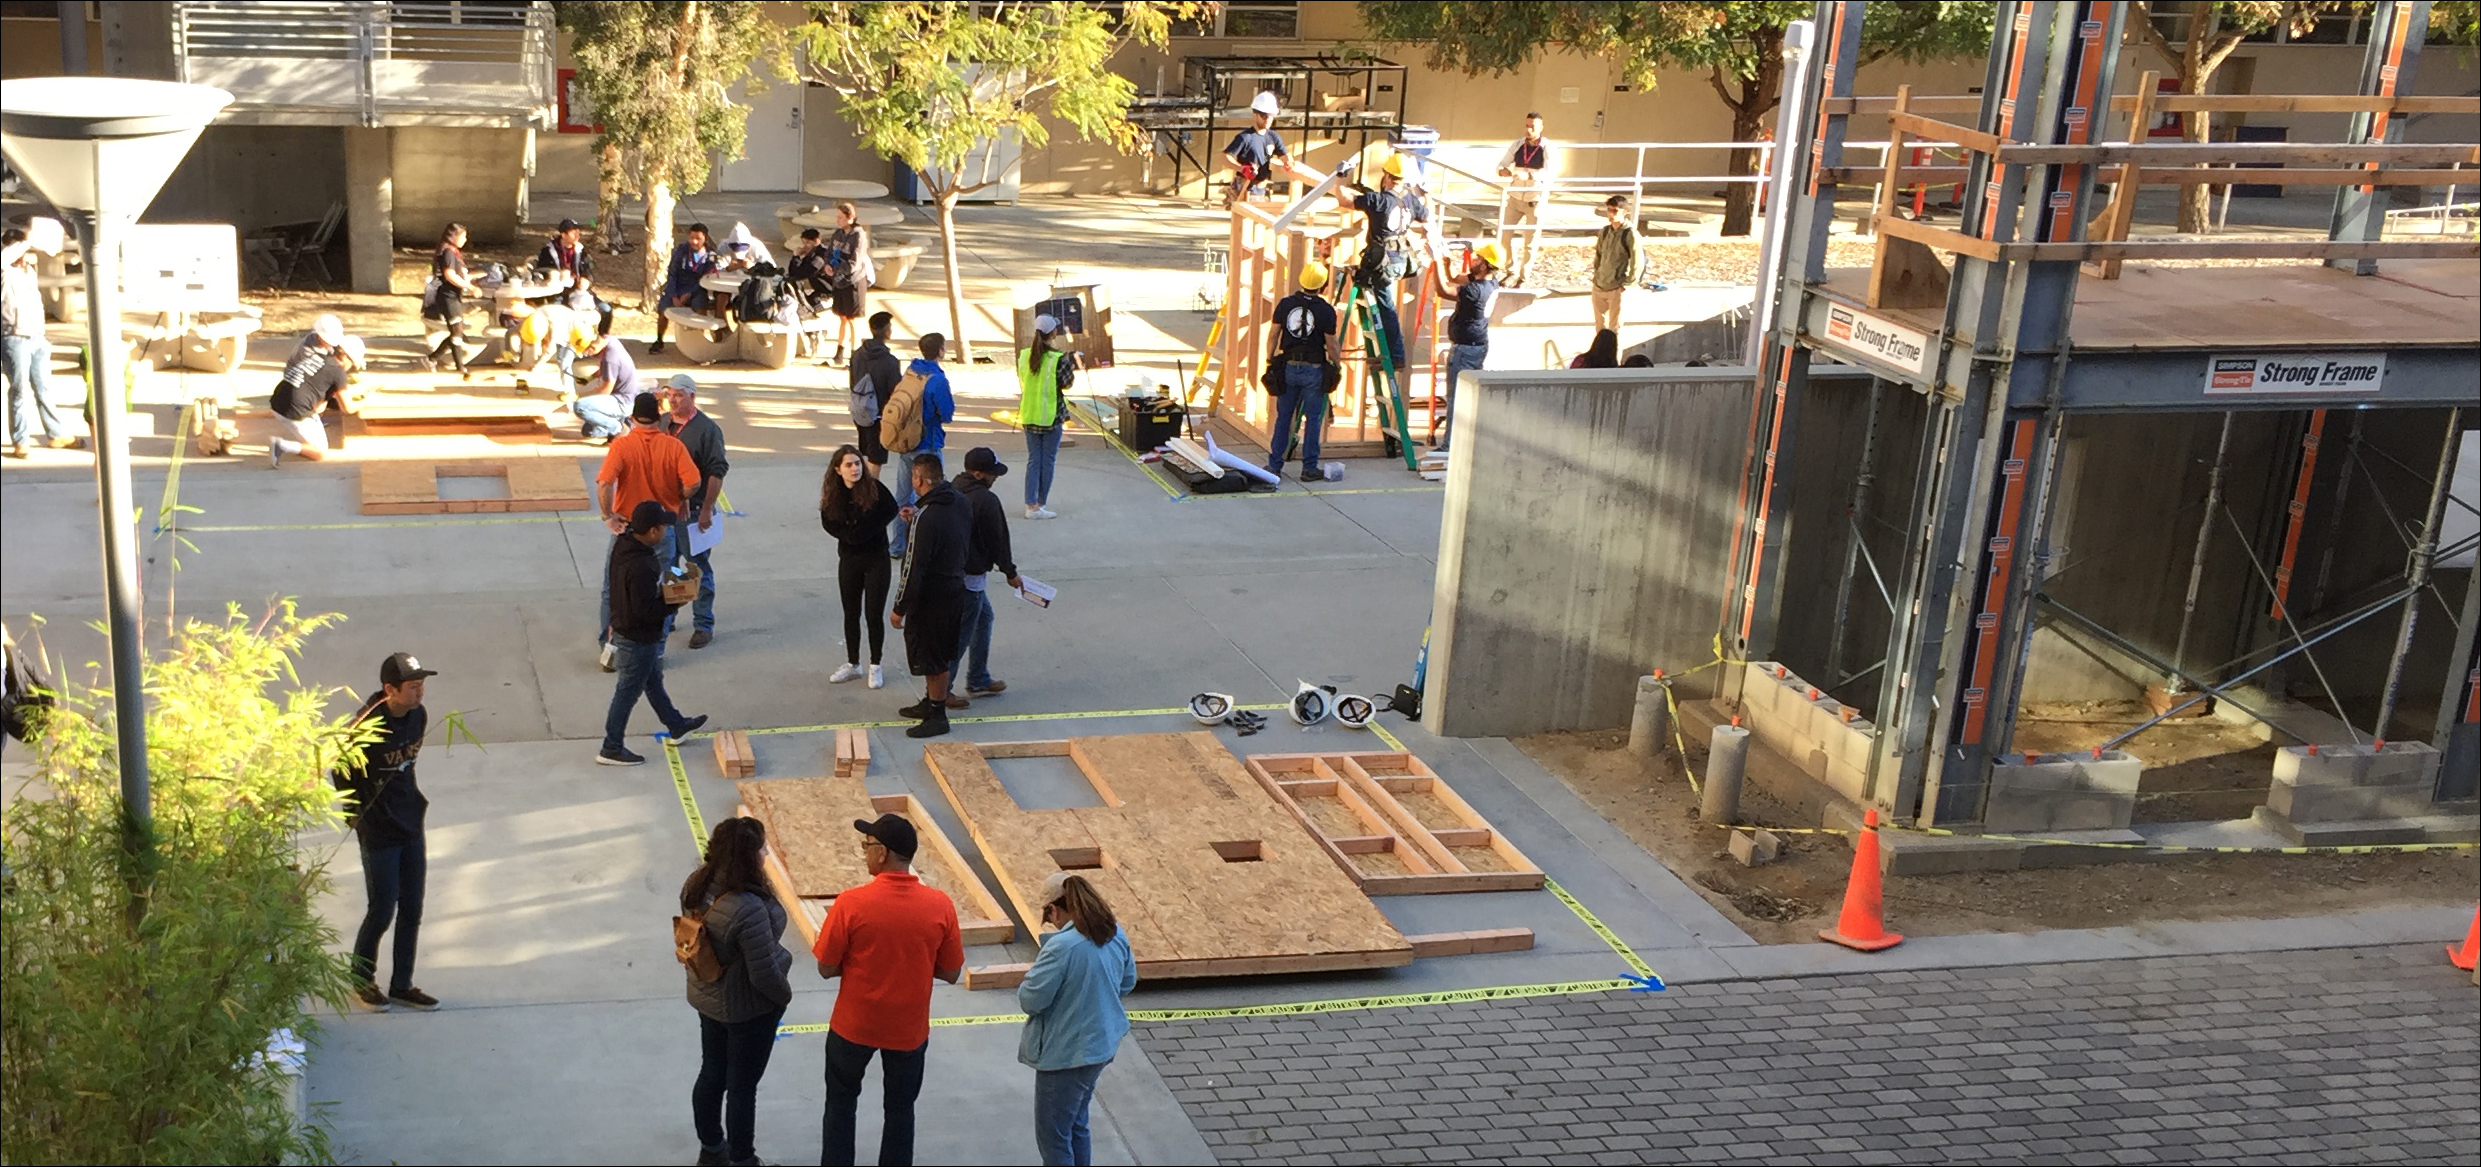
Hammer strikes echoed through the sunny plaza outside the Construction Innovations Center at Cal Poly in San Luis Obispo, California.
Wooden structures sprouted around the plaza April 6, as 17 student teams from 16 universities competed in the Timber-Strong Design Build competition, sponsored by the American Wood Council, Simpson Strong-Tie and APA – The Engineered Wood Association.
The competition was part of the 2019 Pacific Southwest Conference, hosted by Cal Poly’s American Society of Civil Engineers (ASCE) chapter.
“This competition is a good place to test what we learn,” said Daniel Look, captain of the Cal Poly Pomona team. The structural engineering senior, who had just earned his Engineer in Training certification, and his team built their entry with a grass-topped roof to serve as insulation, light paint coating to reflect heat and lightweight design to conserve resources.
“Wood is a lot more sustainable,” Look said. “We wanted to take full advantage of the material.”
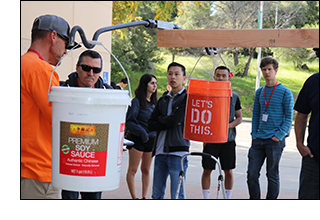 Each team was tasked with designing and building a 4-foot-by-6-foot wooden structure with shear walls, a cantilevered roof beam and door and window openings. Points were awarded based on strength and durability, sustainability, construction, presentation and creativity. Deflection of the cantilevered roof beam, tested with 135 pounds, had to fall within .5 and 1 inch (test pictured at right).
Ashley Lopez, the captain of the San Diego State University team, which won last year’s competition, came hoping to repeat. The construction program senior, who already has a job offer with a general design and construction firm, planned to use her wood framing class training and tips from her uncle and dad, who both have worked in construction, to lead her team to a second consecutive victory.
“You have to pay attention to the details,” she said. “Every little thing counts.”
While each team had the same parameters, their designs and building approaches varied widely. Some had prefabricated their wall frame assemblies, as allowed by the rules; others built completely on site. Some decorated the panels used for their shear walls and roof sheathing while others left the walls and roofs bare.
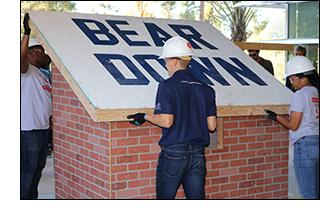 The University of Arizona team built a structure with a shed roof and shear walls painted to look like brick veneers, inspired by other buildings on their campus (pictured at right).
Students from the University of Hawaii at Manoa, which had to ship its materials five weeks in advance of the competition, built a structure with sheathing painted to look like a tropical cabin with flowers and a cantilevered roof beam that looked like a tree limb.
The University of Southern California team built a sheathed structure painted to look like a snow-capped log cabin.
“Sustainability was important to us,” said USC co-captain Emmy Park, who pointed out to the judges during their presentation that they used as little non-wood material as possible.
Park’s co-captain Kirsten Briggs agreed. “Wood is the only naturally occurring building material,” she said. “You know where it comes from, and you know it can be reused or recycled.”
Recycling, reuse and disposal of the materials factored into each team’s score.
 After all the construction and presentations, students lounged in the sun and shade to await the results.
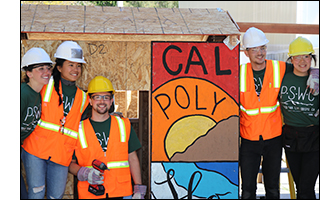
In the end, the professional engineers who volunteered to judge the competition were most impressed by host team Cal Poly San Luis Obispo’s solidly built structure (pictured at right). The University of Arizona’s shed-roofed structure placed second, and the team from University of California Los Angeles, took third prize.
Was it worth it?
“It was a team-building effort,” said Park from USC. “Even when it was a struggle, we learned a lot. And we did it together.”
To see more pictures from the competition, view the gallery GO >
Getting Technical
Framing Big Buildings for Success
A well-built frame is critical to the quality and longevity of a structure. While the responsibility for building design rests with the architect and the engineer of record, the framer has a large responsibility too: to make sure that what is built matches the plan.
Here are some guidelines for framers to follow in order to frame large buildings correctly and avoid common pitfalls.
Does the frame match the prints?
Using the right materials and fastening schedules is critical. Watch for small errors in materials. Use the same grade and thickness of panels that is called out in the plans. Generally, OSB and plywood are interchangeable for structural applications, but in some cases plywood is necessary. Notice, too, if special grades like Structural I are specified; STRUC I has a greater shear capacity that can be necessary in shear wall applications of large wood buildings.
Framing details and fastening schedules often change from floor to floor, so double-check that the installed materials match the plans as the levels go up.
Check load paths.
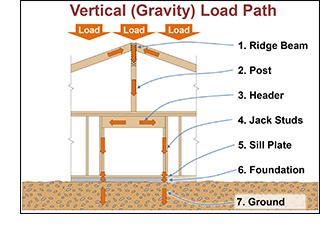 A continuous load path is essential to structural integrity. Missing connections and misaligned framing are a recipe for problems. The frame of a structure does its job—carrying the load of gravity, resisting wind or seismic forces—only when framing materials are correctly aligned and securely connected.
Anchor bolts and hold-downs are not interchangeable. Hold-downs prevent overturning of the entire wall assembly, while anchor bolts prevent sliding between the bottom plate of the wall and the concrete foundation. Framers should always follow the engineer’s recommendations for hold-downs. For anchor bolts, add large plate washers below the nut. A nut without a washer has little capacity, and large plate washers help reinforce the anchor bolt connection to prevent the sill plate from splitting and/or failing.
Again, check the prints. Loads increase from the top down, and the framing, sheathing and fastening may change to resist the load.
Follow fastening guidelines.
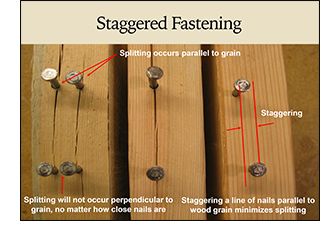 Fasteners have a large impact on the capacity of the system as a whole. Again, this can change from floor to floor or for situations such as shear wall detailing, so pay attention to the plans. In general, the minimum recommended schedule is to use 8d common nails at 6 inches on center at panel edges and at 12 inches on center in intermediate areas. However, sometimes a tighter spacing is specified. In these cases, stagger the nailing to prevent splitting.
Check for overdriving during construction and make corrective adjustments to the pneumatic nailer right away if overdriving is accidentally occurring. In some cases, consistent overdriving can reduce performance enough to require corrective action. For more information, download Effect of Overdriven Fasteners on Shear Capacity, Form TT-012. GET >
Understand the materials.
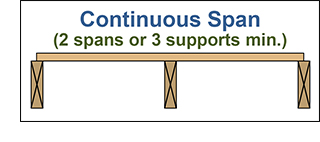
For floor and roof sheathing, orient panels correctly. Plywood and OSB panels have a strength axis that typically runs parallel to the long end, but not always, so check the directional arrow on the panel to be sure. When building floor and roofs, it is important to install the panel with the strength axis perpendicular to supports, and continuously across three or more supports.
 Engineered wood products are very strong when treated and installed correctly. But sometimes inexperienced builders compromise the structural integrity of these products with excessive or badly placed cutting, notching or hole-punching. To avoid this, only alter I-joists, LVL and glulam according to manufacturer’s guidelines, and never drill, cut or notch the flange of an I-joist. For details on best practices with field alterations of these products, consult:
- Field Notching and Drilling of LVL, Form G535 DOWNLOAD >
- Field Notching and Drilling of Glulam, Form S560 DOWNLOAD >
- Performance-Rated I-Joists, Form Z725 DOWNLOAD >
Leave enough space between panels to avoid issues later.
Plywood and OSB sheathing usually arrives on the jobsite in a very dry condition, and then the panels expand as the wood fiber takes up ambient moisture. When possible, acclimate panels before installation, allowing panels to respond to jobsite moisture conditions. To account for expansion, always space plywood and OSB sheathing panels 1/8 of an inch, including at the ends of framing, when fastening.
When buildings have continuous plywood or OSB floor or roof decks exceeding 80 feet in length or width, it is often necessary to include expansion joints, especially if excessive moisture conditions arise. For more details, consult Temporary Expansion Joints for Large Buildings, Form U425. GET >
Control moisture.
Excessive moisture can impact wood products if care isn’t taken to keep materials reasonably dry. Do not let moisture accumulate and do not allow puddles to stand on wood panels for long periods of time. Make sure that wood products are not in direct contact with concrete; concrete is porous, like a sponge, and capillary action will pull water into wood that’s in contact with it. Controlling moisture, including adequate ventilation of enclosed spaces, can prevent issues related to fungal growth, too.
Want to Learn More?
Interested in more on framing big buildings? On-site training may be available in your area. Contact APA’s Field Services for more information. CONTACT US >
Another option is watching Frame It Right! Back to Basics for Big Buildings, our on-demand webinar on the topic. VIEW >
Inside the Circle
 Meet Cathy Scarince
Currently based in Frisco, Texas, APA Engineered Wood Specialist Cathy Scarince is a professional engineer licensed in the state of Colorado. She has a bachelor's degree in civil engineering from the University of Wisconsin at Madison and a master's from Colorado State University. Cathy has six years of experience as a structural engineer designing a variety of building types in wood, concrete, steel and masonry. She also has 18 years of experience working in the commercial construction industry, mainly in quality management roles. Her work experience includes creating, implementing and managing quality programs and plans, documenting and improving work processes, investigating quality defects and implementing measures to prevent future defects. Cathy also has experience with knowledge management and training and mentoring of team members in quality management best practices.
Archived Newsletters
Summer 2019 GO >
Spring 2019 GO >
Winter 2019 GO >
Summer 2018 GO >
Spring 2018 GO >
Autumn 2018 GO >